Appearance
UnityPredict Model Editor
The Basics
A Model is a high level representation of an AI solution that has a set of inputs and a set of outputs. Models can have different types of auto-generated interfaces (ex. Form, Chatbot, etc.) and even have pricing configurations that define how much the consumer of a model should pay for using it.
The page serves as an interface to create and configure a model.
Configuring a model consists of two steps:
- Providing general information about the model, such as the model’s name, category, description, etc.
- Configuring the AI Engine that will be used to run the model.
UnityPredict generates a webpage for every model that is added to the platform. This Model Inference page is an auto-generated UI created based on the information you provide in these two steps. Furthermore, depending on how you configure the model, you can make the Model Inference page public, or keep it private. Finally, for public models, you can even configure your model to require payment so that you can generate revenue from its usage.

Info Tab
The info tab provides fields that help define the information that is displayed in the Model Inference page. It also let's you set the visibility in the Model Central marketplace, and even certain monetization settings.
General Model Information
It is highly recommended that you provide as much details as possible about your model using this section of the model editor page. These details help consumers of your models more easily understand and use your model. This information is especially important if you plan to make your models public and/or monetize them.
Model name :This field displays the name of the model. If you make you model public, this is shown in the Model Central search results.Model Description :This field provides a description of the model's functionality and purpose. If you make you model public, this is shown in the Model Central search results.Long Description :This field provides a more detailed and comprehensive description of the model, including its technical specifications, architecture diagrams, training data, and more. This information is displayed under a specificDetailssection in the Model Inference page.External Redirect URL:This (optional) field provides allows the model developer to provide a link to any external website (ex. GitHub). This redirect is triggered if the user clicks on the model logo in the Model Inference page.Category :This field categorizes the model based on its functionality or domain.Applications :This field lists the potential applications or use cases for the model.
Model Visibility
By default, all models are private. This means that they are only available to users that have access to the repository that the model is in. However, as a builder, you can also choose to make your model public.
Public models provide a way for developers to easily share their creations (whether an individual model or a complex AI solution) with the world. With auto-generated API & UI provided by UnityPredict, other AI solution builders, and even end users can discover your model and use it.
Finally, with a public model, you can also start generating revenue from the model(s) and intelligent component(s) that you build. Other builders on UnityPredict can also find your model and possibly start using it in their own creations (UnityPredict's chained-model functionality makes this very easy).
Finally, a public model appears in the Model Central search results. This means that your model's inference page is accessible both through the Model Central page of the UnityPredict Console and through ModelCentral.ai. The benefit of listings through ModelCentral.ai is that the website is fully public (unlike the UnityPredict Developer console). This means that your model will be indexed by search engines and become more easily discoverable on the web. You can also create your own organization website and market your public models using the Organization Website Builder.
There are a few properties that control the model's visibility:
Model Alias :This field allows you to assign a friendly alias to your model so that the model URL is easier to remember (this also provide SEO benefits).Model URL :There are three types of Model Urls:1) UnityPredict Console Url: this is the url that you can share with anyone who has access to the developer console.
2) ModelCentral Url: this is only available if your model is public
3) Component Url: this is only available if you are using a chatbot interface. This url can be used to embed the chatbot as an iframe on other websites.
Active :While this toggle is disabled, only the model developer can run the model. It can be enabled once the model is production ready.Public :This toggle allows you to switch between public and private state. Note: public models undergo a review process that can take up to 48 hours to complete. During this time, the status will show asUnder Review
Pricing
This section of the model configuration page provides controls that help fine tune how the compute costs and monetization are applied to the model.
UnityPredict engines are completely serverless. This means that charges occur only when inference is being executed. There are three types of charges that can occur when a model is executed (i.e. during inference):
1) Compute charges: these are costs incurred by running the model/engine code on the proper infrastructure
2) Usage charges: this is an optional, per-inference charge that a developer can charge to users of a model
3) Engine-Reported charges: if a developer uses a custom engine for a particular model, the developer has the option to report an Additional Inference Costs during the execution of the engine code. This cost is ALWAYS charged to the model user.
Any income generated from Usage Charges and/or Engine-Reported Charges are immediately transferred to your UnityPredict account. You can request the funds to be transferred to your bank account at any time.
For Compute charges, by default, they are paid by the model user (not the model developer). However, under some conditions, a developer may want to take on that cost. This is where the user can use the Model Owner Pays Hosting Costs option to force the system to take all model compute costs from the developer's own account. There are many scenarios where this may be desired. For example, a developer that has built a speech-to-text model may want to charge users based on the number of minutes of audio. To achieve, this, he/she can set the usage charge to zero, take on the compute cost and then have a custom engine that reports a specific cost based on the number of minutes of input audio.
Note: if the model developer(s) are themselves using the model (ex. internal usage or testing), then the compute charges are charged to their own account.
Other Pricing Customization Fields
- Do Not Charge User If Error Occurs: If this option is enabled, the model user does not incur any costs in the event that the model inference fails.
- No Usage Charge Within Same Context : When using a custom engine, UnityPredict can track a user session and provide the engine with a context (i.e. saved data) that is maintained across multiple inferences in the same session. This
Contextis specially useful for chatbots and can be enabled in theEngine Configurationtab. This toggle allows the developer to have theUsage Chargeonly taken from the model user's account upon the first inference within a session.
Model Performance Stats Fields
Providing performance metrics can help your model stand out against others on the platform. It also impacts where your model shows up on the search results in Model Central. It is therefore highly recommended that you provide as many performance metrics as you have for your particular model.
You can either select one of the common metrics from the drop down, or add your own.
Model Supporting Links Fields
You can provide supporting links, images and videos for your model. These will enhance the appearance of the model's inference page and make it easier for users to understand the model.
AI Engine Configuration
The AI engine configuration is the most critical step in configuring a working model. Here you need to specify what underlying engine will be used to load and execute your model. You also need to define the model's inputs and outputs so that UnityPredict APIs and UIs can properly invoke your model and pass values into and out of the engine.
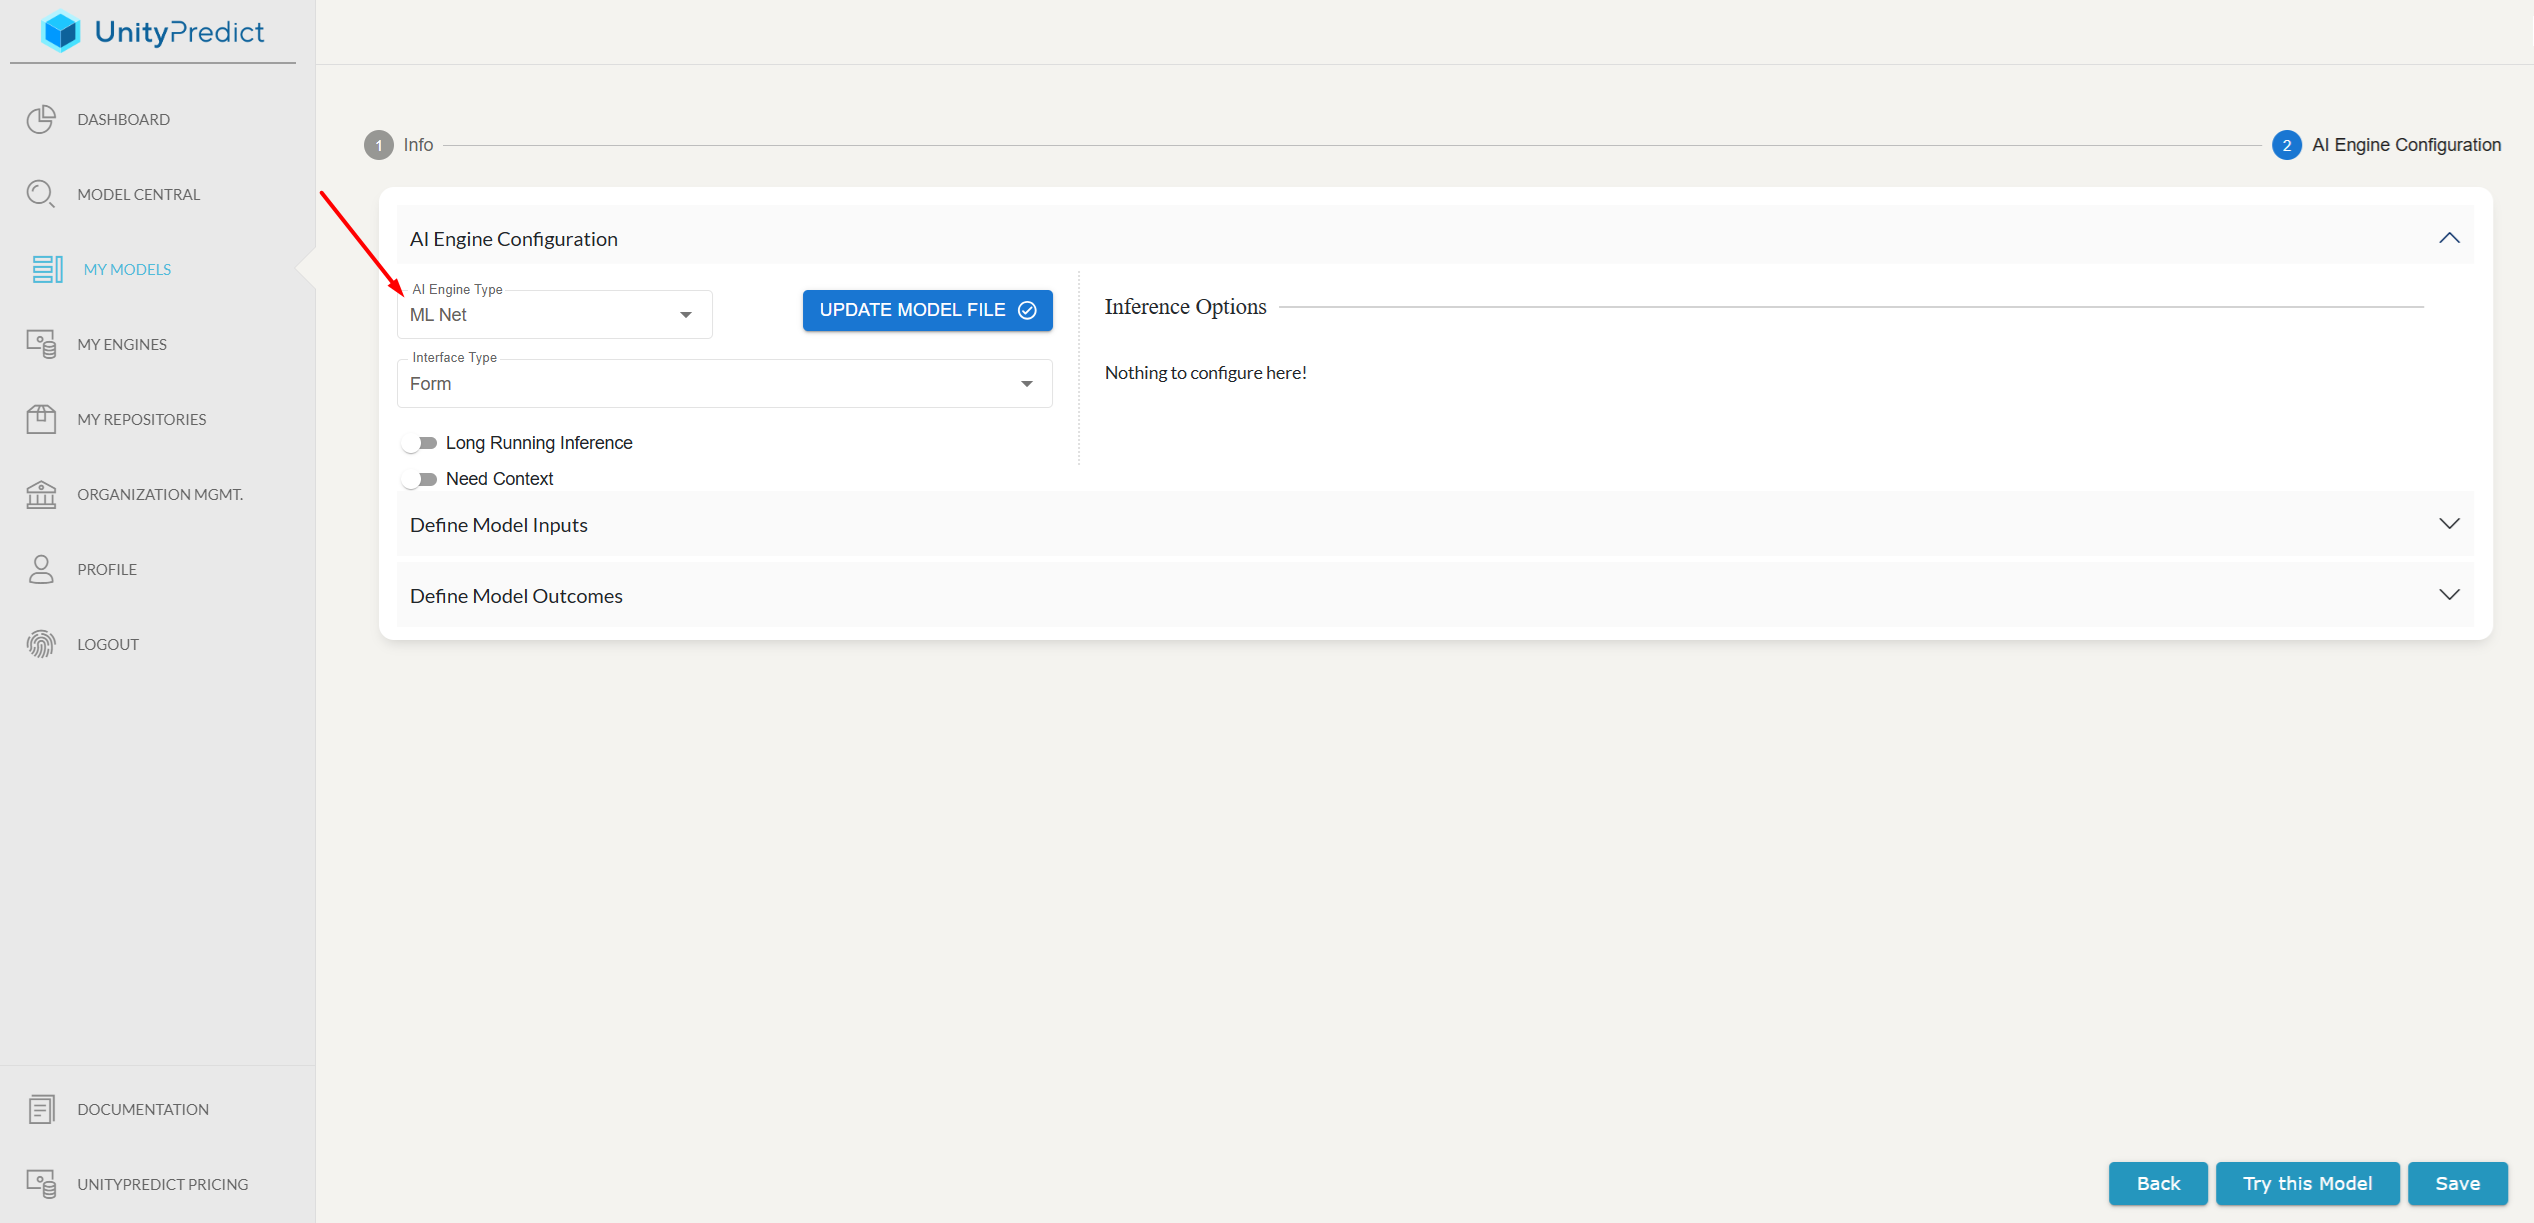
Engine Types
The first step to configuring the AI engine is to select an Engine Type. UnityPredict provides a number of code-free, "Fast Engine(s)" that are designed to get simple models loaded and running very quickly. For these engines, all that is needed from the developer is to save the trained model file, and then upload the file using the Upload Model File button. Below are some examples of these engines:
- ML.Net: this engine supports loading and executing models saved with ML.Net.
- Scikit-Learn: this engine supports loading and executing scikit-learn models saved using
pickle.dump(note: pipelines are not currently supported) - External API: if you have your model hosted in your own infrastructure and would just like to take advantage of UnityPredict's monetization, marketing and analytics services, you can use this engine to connect the model to an external API.
- Custom Engine: this option allows you to point the model at a any custom engine that you have created in UnityPredict. This is the most flexible option, allowing you to create complex, multi-model AI solutions with your own business logic. Once you select this option, you will see a new drop-down which will allow you to select the target engine (the list will contain any accessible engine from your
My Enginespage).
Interface Types
UnityPredict will auto-generate a UI for your model. This allows model users to more easily test and use the model. There are currently two supported interfaces:
- Form: a simple form-based UI where users can provide input data and see the generated outputs
- Chatbot: a chatbot interface that can be used both through the UnityPredict interface or embedded into an external website using an iframe. Note: if you
Additional Engine Options
Long Running Inference: By default, UnityPredict assumes that inference will take less than 30 seconds to complete. If you expect your model will take longer than that to run, then this option must be selected.
Need Context: This option can be used to maintain data across multiple inferences. This option is currently only valuable if you are using a custom Engine. If this option is selected, UnityPredict will track a user session using a
Context Idand will automatically store context data across multiple inferences. Every time the engine is invoked by the same user in the same session (i.e. sameContext Id), UnityPredict will provide the engine with the values stored in theContextfrom the last run. This particular functionality is especially useful when building chatbot engines where you want the chatbot to remember prior conversation with the user.
Model Input Definition
In order for UnityPredict to be able to properly invoke your model and pass the inputs to the engine, you need to define the input variables that your model and engine expect. This is done by adding all the required inputs under the Define Model Inputs section of the page.

You can add new variables using the Add New Input item in the list view. Similarly, you can delete inputs by using x icon next to each variable name.
For each input, you must at least provide the following:
- Name: The name of the variable. This must match exactly what the model and/or engine expect.
- Input Type: Data type of the variable. This can be one of a number of supported data types (e.g., String, Number, Date, etc.). The selection here also changes the auto-generated UI that is displayed on the model inference page
The following optional fields are also available:
- Input Description: This field allows you to provide a brief description of the input, explaining its purpose and expected format.
- Default Value: This field allows you to specify a default value for the input, which will be used if the user does not provide a value.
- Enable Multiline: This toggle allows you to enable multi-line input for the input field in the auto-generated UI. This allows users to enter text across multiple lines.
- Hide Input: This toggle allows you to hide the input field from the auto-generated UI. This is especially useful when combined with the
Default Valueto allow you to use the same underlying engine for multiple models and use a particular variable to change the behavior of the engine. - Enable Validation: This toggle allows you to enable input validation, marking the variable as a
requiredfield and ensuring that the user enters a valid input for the field.
Input Options
Input Options are primarily used for controlling the look and feel of the auto-generated UI. Adding options essentially forces the UI to show a drop-down for a particular variable. This is especially useful when you want to make sure that users are providing proper inputs for a particular field.
For example, you might have a model variable called Race which can be one of a few categories. However your model accepts race as an integer. You can use Input Options to define mappings between a friendly drop-down option/name and the actual integer value that the model expects.
Note: these mappings are resolved in the UI and any API invocations of the model will require users to use the actual data types. The UI will show the mapping table in the auto-generated UI so the users of the model can see how to handle the mapping. However we still recommend that you talk about the mappings in your model's Long Description
Model Output Definition
Define Model Output Fields
Model output definitions work essentially the same way as input definitions. There are only a few different options available, specifically for presenting the outputs in the auto-generated UI.
- Enable Multiline: This toggle is available for
Stringdata types and enables multi-line text display for the variable. - Enable View/Image Preview: This toggle is available for
Filedata types and enables a preview component the variable.