Appearance
UnityPredict API
Introduction
This guide provides all the necessary details for utilizing the UnityPredict prediction APIs. These APIs empower developers to make predictions against models hosted on UnityPredict using simple API calls.
💡 Tip: For Python developers, we also provide a convenient Python Client package that simplifies API interactions and handles authentication automatically.
The base endpoint for accessing UnityPredict APIs is:
shell
https://api.prod.unitypredict.com/apiQuick Start Guide
How do I know which workflow to use?
- Does your model require file inputs? → Use Models with Input Files
- No file inputs needed? → Use Models without Input Files
File Input Detection: If any of your input variables have a File data type, you must use the file workflow.
Complete Workflow for Models with Input Files
mermaid
graph TD
    A[Start] --> B{Model has file inputs?}
    B -->|No| C[Direct Predict Call]
    B -->|Yes| D[1. Initialize Request]
    D --> E[2. Get Upload URL]
    E --> F[3. Upload File via PUT]
    F --> G[4. Make Predict Call with filename]
    G --> H[5. Poll Status]
    H --> I[6. Download Results]
    C --> H
API Invocation for Models without Input Files
Invoking a model that doesn't have any file inputs (i.e. doesn't require a file upload) is very simple and can be done by simply making a POST to the predict endpoint.
Sample Predict Endpoint API Call
shell
curl --request POST --url https://api.prod.unitypredict.com/api/predict/{model-id} \
--header 'Content-Type: application/json' \
--header 'Authorization: Bearer APIKEY@{yourApiKey}' \
--data '{
    "InputValues": {
        "Age": 61,
        "Chol": 120
    },
    "DesiredOutcomes": [
        "Label"
    ],
    "CallbackUrl": "(Optional) https://your-callback-url.com"
}'
Request Parameters
model-id: The unique model Id of the model that is to be called. This appears in the url/address bar and can also be copied using the copy icon next to the predict button on the inference page (see screenshot below).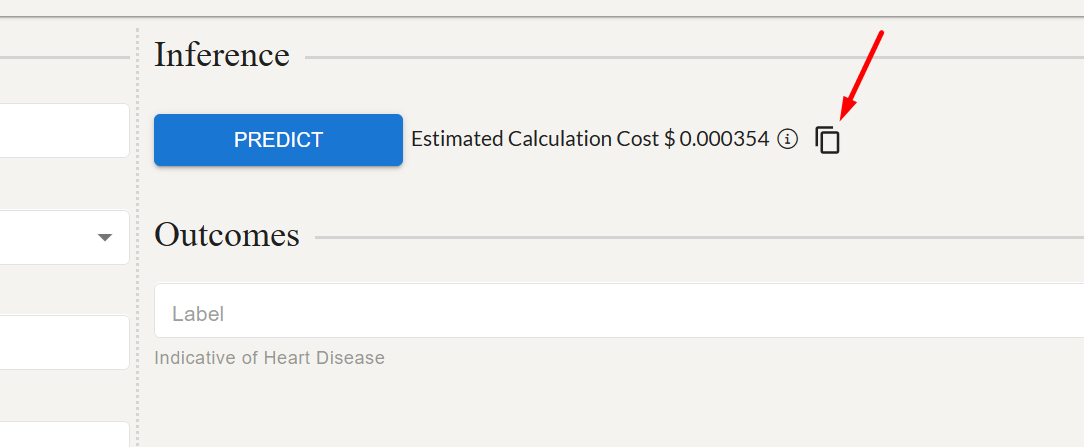
yourApiKey: The API key value that you have created on the Profile page of your UnityPredict account.
- The json body needs to contain the following fields:
InputValues: a key-value map of the input variablesDesiredOutcomes: list of output variable names that you want to get back from the modelCallbackUrl(Optional): Consumer-provided endpoint that will be involved (POST) with a copy of theInferenceResponse. Note: The provided endpoint must be publicly accessible.
Sample Response JSON
json
{
    "contextId": "unitypredict-context-uuid",
    "requestId": "unitypredict-request-uuid",
    "errorMessages": null,
    "logMessages": null,
    "computeTime": "00:00:00",
    "computeTimeCharged": "00:00:00",
    "computeCost": 0.0,
    "outcomeValues": {},
    "outcomes": {},
    "status": "Processing",
    "statusUrl": "https://api.prod.unitypredict.com/api/predict/status/<unitypredict-request-uuid>"
}
Response Parameters
contextId: A unique Id that is linked to the user session. If the model support 'Context' (ex. ChatBots), sending the same contextId on the next predict call will make sure that the model has access to the previous history of inferences from the same context.requestId: A unique identifier of this particular call. This can be used to check the status of inference in long-running jobs.status: Returns the inference status (see below). If this value is returned asProcessing, it means the model needs more time to complete inference (see status API section).errorMessages: Any error messages that happened during inference.computeTime: Total run time for inference.computeTimeCharged: Amount of compute time actually charged. For some more optimized models, this value can be shorter thancomputeTimecomputeCost: Total cost of inference. This is charged to the account linked to the API key used for making the call.outcomes: Contains the output values and probabilities (if provided by the model). Note: some models return multiple values for a single variable.statusUrl: A URL that can be used to check the status of the inference.
Response Codes
| Response Code | Short Description | Long Description |
|---|---|---|
| 200 | Success | The request was successful. |
| 400 | Bad Request | The request was invalid. |
| 401 | Unauthorized | Authentication of the API key failed. |
| 403 | Forbidden | Access denied. |
| 404 | Not Found | The resource was not found. |
| 500 | Internal Server Error | An unexpected error occurred on the server. |
Status Codes
| Status | Status Description |
|---|---|
| "Completed" | Engine has successfully completed its execution |
| "Error" | Engine has faced errors during execution. Check errorMessages for error details |
| "Processing" | Engine is still processing the prediction |
| None | No status from Engine detected. Possibly due to server errors |
OPTIONAL: Predict Endpoint API Call waiting for completion
NOTE: Use this endpoint only if you are using a model that has an inference time within 1 second.
shell
curl --request POST --url https://api.prod.unitypredict.com/api/predict/{model-id}?wait=true \
--header 'Content-Type: application/json' \
--header 'Authorization: Bearer APIKEY@{yourApiKey}' \
--data '{
    "InputValues": {
        "Age": 61,
        "Chol": 120
    },
    "DesiredOutcomes": [
        "Label"
    ]
}'
OPTIONAL: Sample Response JSON for Predict Endpoint API Call waiting for completion
json
{
    "contextId": "unitypredict-context-uuid",
    "requestId": "unitypredict-request-uuid",
    "errorMessages": "",
    "computeTime": "00:00:02.4778178",
    "computeTimeCharged": "00:00:02.4778190",
    "computeCost": 0.0002477819,
    "outcomes": {
        "Label": [
            {
                "dataType": "Boolean",
                "probability": 0.015924746,
                "value": false
            }
        ]
    },
    "status": "Completed"
}
Checking Status of the running Inference
To avoid timeouts in consumers of the API, UnityPredict restricts the runtime of predict endpoint REST calls to 30 seconds. Since some AI models/solutions require more time to run, the API will return Processing status in the response if the model does not finish in time. In this case, you can use check the status of a particular request using the RequestId returned from the predict API call. The response model for this endpoint will be exactly the same as the original predict endpoint. Once the inference is complete, the status will return as Completed.
shell
curl --request GET --url https://api.prod.unitypredict.com/api/predict/status/{request-id} \
--header 'Authorization: Bearer APIKEY@{yourApiKey}'
Request Parameters
request-id: The unique request identifier returned by the original call to thepredictendpoint
Response Parameters
contextId: A unique Id that is linked to the user session. If the model support 'Context' (ex. ChatBots), sending the same contextId on the next predict call will make sure that the model has access to the previous history of inferences from the same context.requestId: A unique identifier of this particular call. This can be used to check the status of inference in long-running jobs.status: Returns the inference status (see below). If this value is returned asProcessing, it means the model needs more time to complete inference (see status API section).errorMessages: Any error messages that happened during inference.computeTime: Total run time for inference.computeTimeCharged: Amount of compute time actually charged. For some more optimized models, this value can be shorter thancomputeTimecomputeCost: Total cost of inference. This is charged to the account linked to the API key used for making the call.outcomes: Contains the output values and probabilities (if provided by the model). Note: some models return multiple values for a single variable.
Response Codes
| Response Code | Short Description | Long Description |
|---|---|---|
| 200 | Success | The request was successful. |
| 400 | Bad Request | The request was invalid. |
| 401 | Unauthorized | Authentication of the API key failed. |
| 403 | Forbidden | Access denied. |
| 404 | Not Found | The resource was not found. |
| 500 | Internal Server Error | An unexpected error occurred on the server. |
Understanding Response Structures
File Outcome Response:
json
{
    "outcomes": {
        "Transcription": [
            {
                "dataType": "File",
                "probability": 0.0,
                "value": "transcript_12345.txt"  // ← This is the filename to download
            }
        ]
    }
}
To download: Use GET /predict/download/{requestId}/{filename}
Downloading Generated Output File(s)
Some models may produce output files (i.e. variables with data type of File). When the response is received from the predict endpoint, only the output file name is shown in the outcomes. Below is an example of such a response.
json
{
    "contextId": "unitypredict-context-uuid",
    "requestId": "unitypredict-request-uuid",
    "errorMessages": "",
    "computeTime": "00:00:02.4778178",
    "computeTimeCharged": "00:00:02.4778190",
    "computeCost": 0.0002477819,
    "outcomes": {
        "TranscriptFile": [
            {
                "dataType": "File",
                "probability": 0.0,
                "value": "generated_transcript.txt"
            }
        ]
    },
    "status": "Completed"
}
In order to retrieve/download the generated output, you will need to use the download endpoint as shown below. Notice that the file name will be whatever value is returned for the output variable's value.
shell
curl --request GET --url https://api.prod.unitypredict.com/api/predict/download/{request-id}/{file_name} \
--header 'Authorization: Bearer APIKEY@{yourApiKey}'
Request Parameters
request-id: The unique request identifier returned by the original call to thepredictendpointyourApiKey: The API key value that you have created on the Profile page of your UnityPredict account.
Response Codes
| Response Code | Short Description | Long Description |
|---|---|---|
| 200 | Success | The request was successful. |
| 400 | Bad Request | The request was invalid. |
| 401 | Unauthorized | Authentication of the API key failed. |
| 403 | Forbidden | Access denied. |
| 404 | Not Found | The resource was not found. |
| 500 | Internal Server Error | An unexpected error occurred on the server. |
API Invocation for Models with Input Files
When using the API for invoking models that require input file(s), the inference process will involve 3 steps:
- Initializing the Request: this involves making an initial call to generate a
RequestId - Uploading Input Files: this involves uploading the files for the
RequestId - Invoking Inference: this step starts the inference process for a particular
RequestId
The sections below outline these steps.
1. Request Initialization
You can initialize the request by making a POST against the initialize endpoint for the particular Model Id
IMPORTANT: This step does NOT require a request body - only the model ID in the URL.
shell
curl --request POST --url https://api.prod.unitypredict.com/api/predict/initialize/{model-id} \
--header 'Authorization: Bearer APIKEY@{yourApiKey}'
Request Parameters
model-id: The unique model Id of the model that is to be called. This appears in the url/address bar and can also be copied using the copy icon next to the predict button on the inference page (see screenshot below).yourApiKey: The API key value that you have created on the Profile page of your UnityPredict account.
Response: Returns only a requestId that you'll use in subsequent steps.
Sample Response JSON
json
{
    "contextId": "unitypredict-context-uuid",
    "requestId": "unitypredict-request-uuid",
    "errorMessages": null,
    "logMessages": null,
    "computeTime": "00:00:00",
    "computeTimeCharged": "00:00:00",
    "computeCost": 0.0,
    "outcomeValues": {},
    "outcomes": {},
    "status": "Processing"
}
Response Parameters
requestId: A unique identifier of this particular inference. This will be used for subsequent file uploads and API calls.
Response Codes
| Response Code | Short Description | Long Description |
|---|---|---|
| 200 | Success | The request was successful. |
| 400 | Bad Request | The request was invalid. |
| 401 | Unauthorized | Authentication of the API key failed. |
| 403 | Forbidden | Access denied. |
| 404 | Not Found | The resource was not found. |
| 500 | Internal Server Error | An unexpected error occurred on the server. |
2. Uploading Files
IMPORTANT: You must repeat steps 2.1 and 2.2 for EACH file input variable.
Uploading input files will be a two step process:
- Get a public upload link for a specific file against a specific
Request Id - Use returned
uploadLinkattribute from step 1 to perform a PUT operation for the file content. UnityPredict allows files up to 5GB to be uploaded.
CRITICAL: Save the fileName from step 2.1 - you'll need it for the predict call in step 3.
Step 2.1: Get Upload URL
To be able to upload a file, you need to generate a temporary, pre-signed upload link. This link is attached to your specific Request Id.
Sample Request Parameters
shell
curl --request GET --url https://api.prod.unitypredict.com/api/predict/upload/{request-id}/{upload-file-name.ext} \
--header 'Authorization: Bearer APIKEY@{yourApiKey}'
Request Parameters
request-id: The unique request identifier from the response of theinitializeendpointupload-file-name.ext: Name of the file that you want to upload
Sample Response Json
json
{
    "uploadLink": "file-upload-link",
    "fileName": "unitypredict_generated_filename"
}
Response Parameters
uploadLink: Link which can be used to perform aPUToperation to upload your file.fileName: Generated filename that will be used as the input variablevaluewhen invoking thepredictendpoint in step 3.
Response Codes
| Response Code | Short Description | Long Description |
|---|---|---|
| 200 | Success | The request was successful. |
| 400 | Bad Request | The request was invalid. |
| 401 | Unauthorized | Authentication of the API key failed. |
| 403 | Forbidden | Access denied. |
| 404 | Not Found | The resource was not found. |
| 500 | Internal Server Error | An unexpected error occurred on the server. |
Step 2.2: Upload File Content
To upload the actual file content, you can simply use a PUT operation against the uploadLink retrieved in the previous step.
Sample Request Parameters
shell
curl --request PUT --url {uploadLink}  \
--header 'Content-Type: application/octet-stream' \
--data-binary @/path/to/your/file.ext
Important Parameters
uploadLink:uploadLinkURL from the previous stepContent-Type: application/octet-stream: Binary stream of the file to be uploaded
CRITICAL WARNINGS:
- DO NOT include Authorization header (presigned URL handles auth)
- DO NOT use multipart/form-data (use application/octet-stream)
- Use
--data-binaryfor file uploads, not--data
Response Codes
| Response Code | Short Description | Long Description |
|---|---|---|
| 200 | Success | The request was successful. |
| 400 | Bad Request | The request was invalid. |
| 401 | Unauthorized | Authentication of the API key failed. |
| 403 | Forbidden | Access denied. |
| 404 | Not Found | The resource was not found. |
| 500 | Internal Server Error | An unexpected error occurred on the server. |
3. Predict with Request Id
Once all the input files are uploaded using the procedure in step 2, you can invoke the predict endpoint for the particular Request Id by passing the Request Id in the url.
CRITICAL: You will need to make sure that the value of the variables with File data type matches the unitypredict_generated_filename returned by the upload endpoint (Step 2.1), NOT your original filename.
The rest of the operations for inference is exactly the same as the regular predict REST calls.
shell
curl --request POST --url https://api.prod.unitypredict.com/api/predict/{model-id}/{request-id} \
--header 'Content-Type: application/json' \
--header 'Authorization: Bearer APIKEY@{yourApiKey}' \
--data '{
    "RequestId": "{request-id}",
    "ContextId": "{context-id}",
    "InputValues": {
        "Input File": `unitypredict_generated_filename`,
    },
    "DesiredOutcomes": [
        "Label"
    ]
}'
Request Parameters
model-id: The unique model Id of the model that is to be called. This appears in the url/address bar and can also be copied using the copy icon next to the predict button on the inference page (see screenshot below).request-id: The unique request identifier generated in step 1.yourApiKey: The API key value that you have created on the Profile page of your UnityPredict account.- The json body needs to contain the following fields:
InputValues: a key-value map of the input variablesDesiredOutcomes: list of output variable names that you want to get back from the modelRequestId: The unique request identifier generated in step 1.ContextId: The unique context identifier generated in step 1.
Sample Response JSON
json
{
    "contextId": "unitypredict-context-uuid",
    "requestId": "unitypredict-request-uuid",
    "errorMessages": null,
    "logMessages": null,
    "computeTime": "00:00:00",
    "computeTimeCharged": "00:00:00",
    "computeCost": 0.0,
    "outcomeValues": {},
    "outcomes": {},
    "status": "Processing",
    "statusUrl": "https://api.prod.unitypredict.com/api/predict/status/<unitypredict-request-uuid>"
}
Response Parameters
contextId: A unique Id that is linked to the user session. If the model support 'Context' (ex. ChatBots), sending the same contextId on the next predict call will make sure that the model has access to the previous history of inferences from the same context.requestId: A unique identifier of this particular call. This can be used to check the status of inference in long-running jobs.status: Returns the inference status (see below). If this value is returned asProcessing, it means the model needs more time to complete inference (see status API section).errorMessages: Any error messages that happened during inference.computeTime: Total run time for inference.computeTimeCharged: Amount of compute time actually charged. For some more optimized models, this value can be shorter thancomputeTimecomputeCost: Total cost of inference. This is charged to the account linked to the API key used for making the call.outcomes: Contains the output values and probabilities (if provided by the model). Note: some models return multiple values for a single variable.statusUrl: A URL that can be used to check the status of the inference. Refer to Checking Status of the running Inference section for the API details.
Response Codes
| Response Code | Short Description | Long Description |
|---|---|---|
| 200 | Success | The request was successful. |
| 400 | Bad Request | The request was invalid. |
| 401 | Unauthorized | Authentication of the API key failed. |
| 403 | Forbidden | Access denied. |
| 404 | Not Found | The resource was not found. |
| 500 | Internal Server Error | An unexpected error occurred on the server. |
Status Codes
| Status | Status Description |
|---|---|
| "Completed" | Engine has successfully completed its execution |
| "Error" | Engine has faced errors during execution. Check errorMessages for error details |
| "Processing" | Engine is still processing the prediction |
| None | No status from Engine detected. Possibly due to server errors |
OPTIONAL: Predict Endpoint API Call waiting for completion
NOTE: Use this endpoint only if you are using a model that has an inference time within 1 second.
shell
curl --request POST --url https://api.prod.unitypredict.com/api/predict/{model-id}/{request-id}?wait=true \
--header 'Content-Type: application/json' \
--header 'Authorization: Bearer APIKEY@{yourApiKey}' \
--data '{
    "InputValues": {
        "Input File": `unitypredict_generated_filename`,
    },
    "DesiredOutcomes": [
        "Label"
    ]
}'
OPTIONAL: Sample Response JSON for Predict Endpoint API Call waiting for completion
json
{
    "contextId": "unitypredict-context-uuid",
    "requestId": "unitypredict-request-uuid",
    "errorMessages": "",
    "computeTime": "00:00:02.4778178",
    "computeTimeCharged": "00:00:02.4778190",
    "computeCost": 0.0002477819,
    "outcomes": {
        "Label": [
            {
                "dataType": "Boolean",
                "probability": 0.015924746,
                "value": false
            }
        ]
    },
    "status": "Completed"
}
Complete Example: Audio Transcription Model
Step 1: Initialize
shell
curl --request POST --url https://api.prod.unitypredict.com/api/predict/initialize/a0f2714a-3f2a-42c3-8e20-1504a7ac429c \
--header 'Authorization: Bearer APIKEY@your-key'
Response: {"requestId": "req-12345"}
Step 2: Get Upload URL
shell
curl --request GET --url https://api.prod.unitypredict.com/api/predict/upload/req-12345/audio.mp3 \
--header 'Authorization: Bearer APIKEY@your-key'
Response: {"uploadLink": "https://s3...", "fileName": "up_67890.mp3"}
Step 3: Upload File
shell
curl --request PUT --url https://s3... \
--header 'Content-Type: application/octet-stream' \
--data-binary @audio.mp3
Step 4: Make Prediction
shell
curl --request POST --url https://api.prod.unitypredict.com/api/predict/a0f2714a-3f2a-42c3-8e20-1504a7ac429c/req-12345 \
--header 'Content-Type: application/json' \
--header 'Authorization: Bearer APIKEY@your-key' \
--data '{
    "InputValues": {
        "Audio File": "up_67890.mp3",
        "Format": "srt",
        "Language": "auto"
    },
    "DesiredOutcomes": ["Transcription", "Language"]
}'
Step 5: Poll Status
shell
curl --request GET --url https://api.prod.unitypredict.com/api/predict/status/req-12345 \
--header 'Authorization: Bearer APIKEY@your-key'
Step 6: Download Results
Once the status is "Completed" and you have file outputs, download them:
shell
curl --request GET --url https://api.prod.unitypredict.com/api/predict/download/req-12345/transcript_67890.txt \
--header 'Authorization: Bearer APIKEY@your-key' \
--output transcript.txt
Troubleshooting
Common Mistakes to Avoid
File Upload Mistakes:
- DON'T include Authorization header in the PUT upload call (presigned URLs handle auth)
- DON'T use multipart/form-data for file uploads (use application/octet-stream)
- DON'T use the original filename in predict call (use the generated filename from upload response)
Workflow Mistakes:
- DON'T use file workflow for models without file inputs
- DON'T skip the initialization step for file-based models
- DON'T use the same requestId across different model invocations
Error Handling
Common HTTP Errors:
- 401 Unauthorized: Check your API key format (
APIKEY@your-key) - 400 Bad Request: Verify request body format and required fields
- 404 Not Found: Check model ID and request ID are correct
- 403 Forbidden: API key may not have access to this model
File Upload Errors:
- "Only one auth mechanism allowed": Remove Authorization header from PUT upload
- "Invalid file format": Check Content-Type is application/octet-stream